How to enable my Security Settings in my AutoSPF account?
Modified on: Wed, 24 May, 2023 at 5:16 PM
The security of your account matters most to us which is why we ensure that we've got a feature that provides you with your most needed security measure like Two-Factor Authentication.
Here are the steps to enable your AutoSPF account security:
- From the left Nav bar, navigate to "Your Settings"

- Next, on the Settings menu, select "Security."

- Then, scroll down to the Two-Factor Authentication section.

- Google OTP is an option that sends the OTP code to your Google email every time someone attempts to log in to your AutoSPF account. If you chose Google OTP from the selection, you will be required to install the Google Authenticator app on your mobile phone.
Google Authenticator link for Android
Google Authenticator link for IOS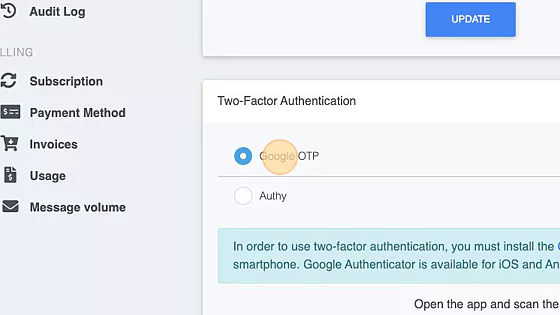
- Once the Google Authenticator app has been successfully installed on your mobile phone, open it and scan the provided AutoSPF QR code on your computer. The mobile app will return an OTP code immediately upon successful scan.

- Enter the OTP code you got from your Google Authenticator mobile app to your AutoSPF account, on the OTP field.
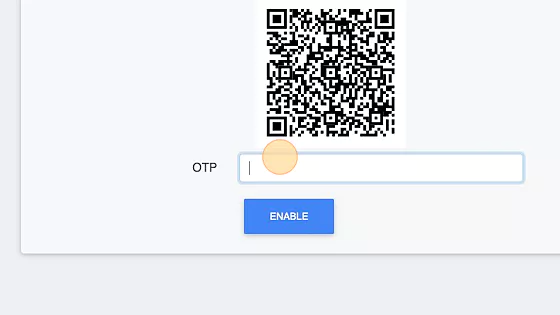
- Then, hit the "ENABLE" button.

- Clicking the "ENABLE" button triggers a "Warning" pop-up asking you to enter your AutoSPF account password. You have to supply your current password in order to authorize the change on your account.
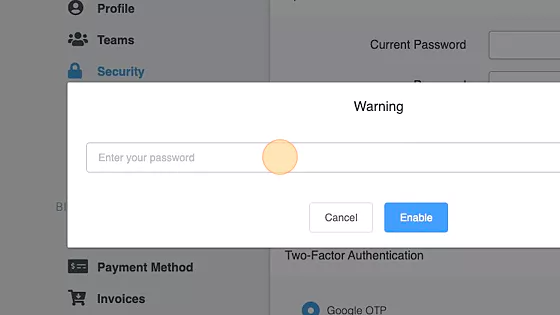
- After entering your AutoSPF account password, click on the "Enable" button from the pop-up to complete your security configuration.

This process confirms that you have successfully set up a Two-Factor authentication to your AutoSPF account. To test the configuration, you can try to log out of your AutoSPF account and log in again. On your re-login attempt, you will be asked to enter the OTP sent to your Google email address that is linked to your AutoSPF account. If this does not work as expected, you can reach out to Support regarding the issue.
- On the contrary, when you chose to set up Twilio Authy as your security settings, you must have an existing Twilio Authy account and the app must have already been installed on your mobile phone or on your computer. If you haven't yet, you can get started by installing the app and registering an account with them.
Authy application download link
- Then, go back to your AutoSPF "Security" page and click on the "Authy" radio button from the Two-Factor Authentication section.

- Next, you will be asked to enter your country code and your phone number in the given field. You need to provide the number where you wish to receive your SMS OTP.
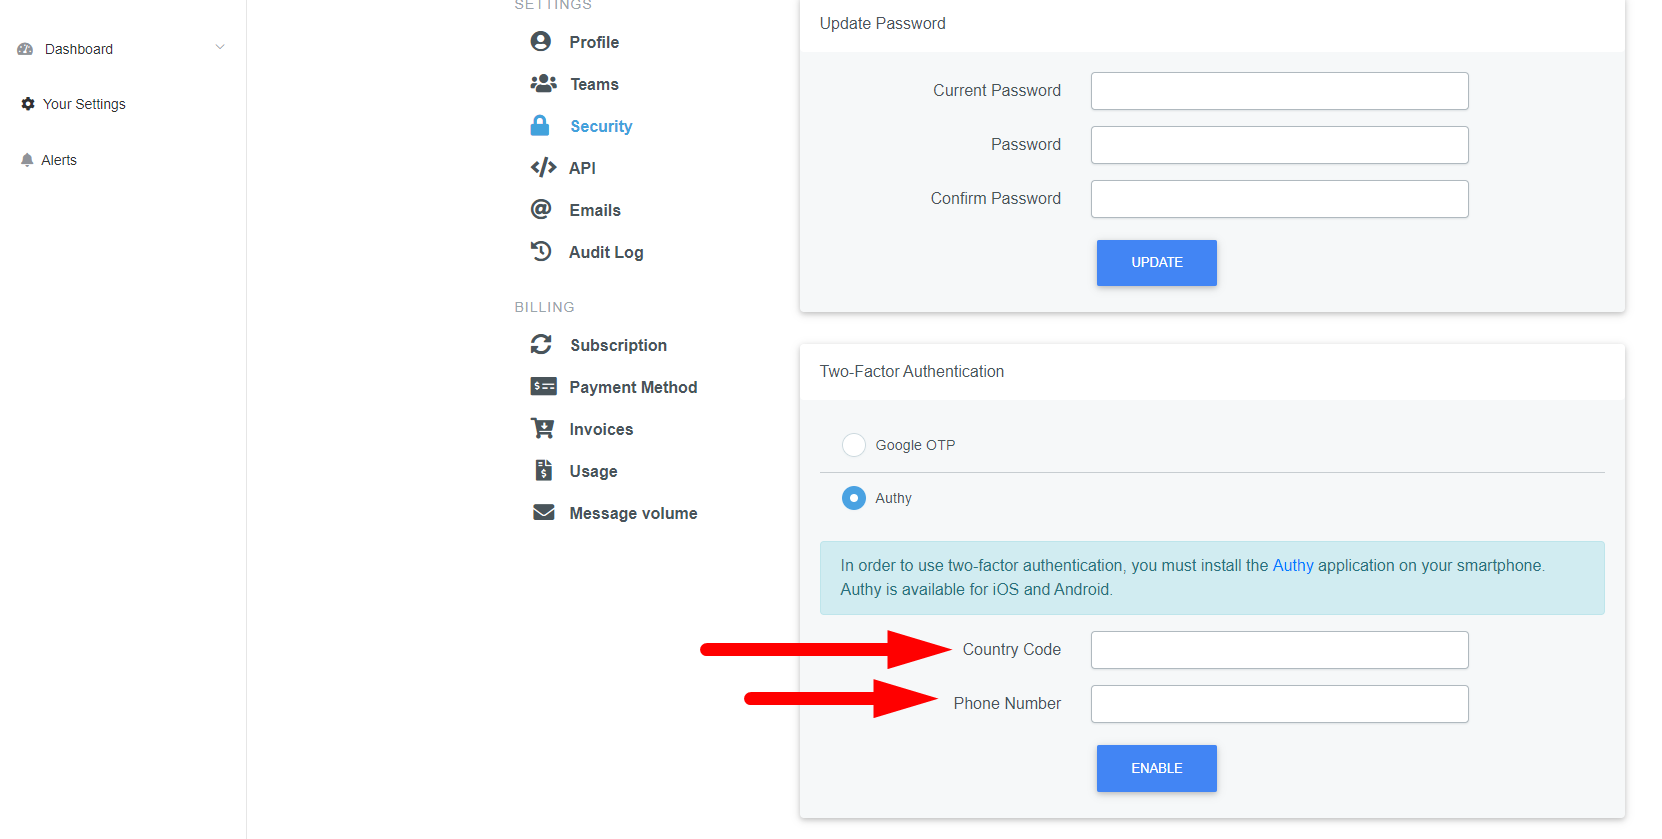
- Then, click the "ENABLE" button.

- Similar to the Google OTP setup, clicking the "ENABLE" button triggers a "Warning" pop-up asking you to enter your AutoSPF account password. Again, you have to supply your current password in order to authorize the change on your account.
- After entering your AutoSPF account password, click on the "ENABLE" button from the pop-up.
[Not ready to be published.
This process is incomplete as we are missing the steps on what happened after an OTP was sent to the registered mobile number on the AutoSPF account from step 13 above. Also, the use of Authy requires scanning a QR code from the application that the user wanted to secure. How and when will the QR code for Authy be generated on AutoSPF? I tried to replicate the steps but the staging is not allowing me to proceed on Authy steps. I got stuck with an error from the Authy selection (see screenshot below)
 ]
]
Did you find it helpful?
Yes
No
Send feedback Sorry we couldn't be helpful. Help us improve this article with your feedback.